Information Page
An information page describes the wiki's customs, technicalities or practices.
An information page describes the wiki's customs, technicalities or practices.
Wiki Resources are resources used to aid editors' editing workflow. Most of the graphics of this wiki rely on these tools to be created. These tools can also assist in-game item menus and tooltip information parsing.
For Copying NBT, Tooltip, and UI
Mod info
- Open sourced
- Actively maintained
WikiTools (Releases Page) is a mod that performs actions to aid editing, such as copying information.
UI/Item Data
- X - copies tooltip of that item you are hovering over, formatted for Tooltips Data
- C - copies UI of an opened menu with default Blank slots formatted for
{{UI}}(Shift+C to copy UIs with default Empty slots) - N - copies the NBT data of an item you are hovering over
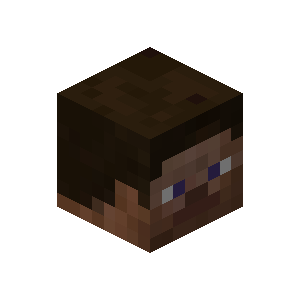
- Z - copies the texture ID of a head
Mod info
- Open sourced
- Actively maintained
SkyHanni (Download Page) is a mod that has a lot of features.
Use /shcopyentites to copy NBT data of nearby entities in a nicely formatted list. This is especially useful for copying stacked armor stands that the server use for displaying floating text with multiple lines, and NPC skin texture IDs.
Mod info
- Open sourced
- Maybe actively maintained
Cowlection (Releases Page) is a SkyBlock enhancement mod made by Cowtipper that allows copying of information of an entity, including the texture ID of a skin.
- Usage
- When looking at the target NPC or mob, type /moo waila
- The information, including the texture ID of a skin, is then copied to clipboard
Mod info
- Open sourced
- Maybe actively maintained
SkyBlock Addons (Homepage To Download) is a popular SkyBlock mod that has the function to copy NBT data.
- Usage
- Use the command
/sba devto enter developer mode - Hover over an item and hit Right Control to copy its NBT Data
For Rendering Skins, Entities, and Armor Sets
For Creating Skin, Entity, and Armor Set Renders
Mod info
- Open sourced
- Actively maintained
WikiTools Renders (Releases Page (Latest)) (Releases Page (1.8.9)) is a mod that performs rendering actions.
WikiTools Renders for the latest version is a fork of the Isometric Renders by Gliscowo (View Mod), which is a very useful mod for general rendering. The benefit of this approach is that features of the Isometric Renders mod can be accessed through WikiTools Renders.
In the latest version, use the /wikirender command to access isometric renders commands, which instructions can be found on the Isometric Renders Wiki.
The following features are supported in the 1.8.9 version and should eventually be supported by the latest version as well.
Entity/Armor Set Render
- M (when facing an entity) - copies the entity you are looking at to memory; it can then be viewed inside Wikitools Interface
- M (when hovering on an item) - adds the item to the entity you have copied; useful in situations where you do not want to acquire an armor set in-game (Use Shift+M to wear a skull/block as a helmet)
- N - copies the NBT data of an entity, including the Base64 string of the skin of NPCs
- K - opens Wikitools Interface for entity rendering (Entity rendering may not function correctly with the Patcher Mod.) (In addition, if you see extra Optifine features like the Christmas hat, turn off Optifine.)
- You can use WikiTools to get skin ID of an NPC
Wikitools Interface Context Buttons 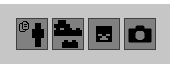
- First button: Copies yourself into the interface
- Second button: Renders the texture image of the copied skin
- Third button: Renders a 72x72 sprite image
- Fourth button: Renders the skin image
- Additionally, the interface provides a lot of additional settings for the final render
To take renders for this wiki:
- Ensure use of the correct width arms (toggle "Small Arms" if needed, WikiTools doesn't always load the size correctly)
- For armor sets, please use wide arms and "Set to Steve"
- Do not use armor stands
Note: This method is deprecated. Please use Wikitools.
This method uses Blender to render a skin. To render a skin you first need to acquire the skin file (See previous section), and then replace is as the input image in the blender file. The downloadable Blender Toolkit files require Blender to open. All skin renders with Blender should make use of Blender Toolkit for consistency.
- Download Blender Toolkit Files
- actual_player.blend - Used in infoboxes
- actual_player_backwards.blend - Not used on wiki directly, but can be useful for map images
For Obtaining Skin Files, Entity, or Armor Set
Item Command Generator (JSFiddle) is a tool that converts NBT data into Minecraft commands.
- Usage
- Copy the NBT Data (Wikitools, SkyBlock Addons formats are supported) from the Auction House, or from any inventory slot you can find it
- Plug each NBT data into the script and generate the commands
- On a vanilla world with cheats enabled, execute each generated command to give yourself such items
- Use Wikitools to render the armor set
Minecraft Armor Color Generator (Website) is a website used to generate Minecraft 1.8.9 commands for leather armor with a specific color, which can be used in a vanilla world with cheats enabled. Requires no assets.
Tips for spawning an entity in your own world and capture it with the Mineshot Mod.
- Usage
- Download Green Screen Texturepack (Discord link) and use it. Sea lanterns will be solid green
- Use the Mineshot Mod and enter a world in creative mode
- Create a floor of solid green
- Start flying so you won't fall when you teleport up
- Run /summon CaveSpider ~ ~2 ~ {NoAI:1,NoGravity:1,Riding:{id:Spider,NoAI:1}} (Note: It needs to be at least 2 blocks or so above the ground to prevent the shadow)
- Run /tp ~ ~2 ~
- Enter isometric view with 5
- Zoom in with +
- Take screenshot with F9 (Note: The default facing direction for summoned mobs and the default angle for Mineshot make it so that the angle doesn't need adjusted)
- Remove background with paint.net (Note: The different sides of the green block can end up in different colors)
- Spawning a complex entity
You can use the Sea Emperor as a reference:
/summon Skeleton ~ ~3 ~ {NoAI:1,Equipment:[{id:bow},{id:leather_boots,tag:{display:{color:11546150}}},{id:leather_leggings,tag:{display:{color:11546150}}},{id:leather_chestplate,tag:{display:{color:11546150}}},{id:skull,Damage:3,Count:1b,tag:{SkullOwner:{Id:"8d9a70ad-6bff-4577-a8e5-732a8a8a9077",Properties:{textures:[{Value:"eyJ0ZXh0dXJlcyI6eyJTS0lOIjp7InVybCI6Imh0dHA6Ly90ZXh0dXJlcy5taW5lY3JhZnQubmV0L3RleHR1cmUvMDQ0YjY1M2JiYjcyN2I1Yzg2NWE4ZWZjNzUwOTJhZmU5MzllMmMzZTY4NjEzZGI5YWJhZTRmMWI2NGY5OWY4In19fQ=="}]}}}}],Riding:{id:Guardian,NoAI:1}}
Note: This method is deprecated. Please use Wikitools.
Tips to obtain textures of items or entities that requires no mods or tools.
- Procedure
- Clearance: Go to your
<.minecraft directory>/assetsfolder and delete the "skins" folder inside of it - Preparation: Open Minecraft, go to the loading zone right before the item you want. Re-delete the skins folder to minimize the number of unwanted items
- Load the Entity: Load the item, then log out right away to prevent getting extra skins; You should now have a bunch of files in your skins folder
- Search for the File: Append the ".png" file extension to each file to view them (a mass file rename tool can be useful); Find the one you want
For Rendering Heads and Sprites
Web tool info
- Open sourced
Head Render Thingy 4.0 (Website) is a web tool used for rendering custom heads and sprites, and obtaining the texture ID of a head.
- Types of Accepted Input
- Head/Skin file
- A Base64 value found in the give command from a NameMC skin page or from NBT data copied from WikiTools
- A known texture ID
Using with mods:
- Use the WikiTools Copy Skull ID feature to copy the texture ID of an inventory item (Z) and put it in the website's texture ID field.
- Use the WikiTools Copy Item Tags feature (N) to copy the NBT item of a N. Identify and copy the Base64 texture value and put it in the website's Base64 value field.
This is how to identify a Base64 texture value:
In the following NameMC skin page give command,
/give @p minecraft:player_head[profile={id:[I;1144308484,1860850411,-1411081819,-1304993305],properties:[{name:"textures",value:"e3RleHR1cmVzOntTS0lOOnt1cmw6Imh0dHA6Ly90ZXh0dXJlcy5taW5lY3JhZnQubmV0L3RleHR1cmUvZTY4MDcyZThkNjM1OTA0NTViNDNjNDdkOGY3ZWQ3YWU4YTkyMzkxNjZiODliZGFjZDU4Yzc3YTQzMGFlZjRjIn19fQ=="}]},minecraft:lore=['{"text":"https://namemc.com/skin/89f48253c7e45ef4"}']]
the Base64 value is
e3RleHR1cmVzOntTS0lOOnt1cmw6Imh0dHA6Ly90ZXh0dXJlcy5taW5lY3JhZnQubmV0L3RleHR1cmUvZTY4MDcyZThkNjM1OTA0NTViNDNjNDdkOGY3ZWQ3YWU4YTkyMzkxNjZiODliZGFjZDU4Yzc3YTQzMGFlZjRjIn19fQ==
In the following NBT data,
{... { "textures": [{ "Value": "eyJ0aW1lc3RhbXAiOjE1MjM1MzYyNDI5NDMsInByb2ZpbGVJZCI6IjQxZDNhYmMyZDc0OTQwMGM5MDkwZDU0MzRkMDM4MzFiIiwicHJvZmlsZU5hbWUiOiJNZWdha2xvb24iLCJzaWduYXR1cmVSZXF1aXJlZCI6dHJ1ZSwidGV4dHVyZXMiOnsiU0tJTiI6eyJ1cmwiOiJodHRwOi8vdGV4dHVyZXMubWluZWNyYWZ0Lm5ldC90ZXh0dXJlLzU3NTFiMmMzMTFhY2Q0OGUwNmY3MTUwOGM2ODczNWZlOWYzYTRmNGQ3NWI5ZWYxYTI0ZmExMzMzZDc3In19fQ==" }] }, ...}
the Base64 value is
eyJ0aW1lc3RhbXAiOjE1MjM1MzYyNDI5NDMsInByb2ZpbGVJZCI6IjQxZDNhYmMyZDc0OTQwMGM5MDkwZDU0MzRkMDM4MzFiIiwicHJvZmlsZU5hbWUiOiJNZWdha2xvb24iLCJzaWduYXR1cmVSZXF1aXJlZCI6dHJ1ZSwidGV4dHVyZXMiOnsiU0tJTiI6eyJ1cmwiOiJodHRwOi8vdGV4dHVyZXMubWluZWNyYWZ0Lm5ldC90ZXh0dXJlLzU3NTFiMmMzMTFhY2Q0OGUwNmY3MTUwOGM2ODczNWZlOWYzYTRmNGQ3NWI5ZWYxYTI0ZmExMzMzZDc3In19fQ==
Web tool info
- Open sourced
SkyCrypt (Website) can search for items carried by players. If an item cannot be obtained or viewed in an in-game menu, but is also owned by a player with API turned on, this method can be suitable.
- Usage
- Search for a specific player on a specific profile that has the item
- To get the tooltip, simply click on an item
- To get a render of a player head: (Note: This method can only apply to player heads)
- Right click on the player head and click "Inspect (Element)"
- The selected element should be of
<div class="piece-hover-area"... - Look for the NEXT ONE OR TWO element. If it is of usable form, take the TEXTURE ID and render it with Head Renderer
- If it is of other forms, unfortunately the item cannot be rendered
> USABLE FORM<br>
<div class="piece-icon..." style="background-image: url("/head/''LOTS OF NUMBER AND LETTERS (TEXTURE ID)''")"...<br>
> NON-USABLE FORMS<br>
<div class="piece-icon..." style="background-image: url("/resourcepack/...<br>
<div class="piece-icon..." style="background-image: url("data:image/png;base64,...
- Please note that, because of the texture and glint changes, the images on the site should never be directly downloaded and used
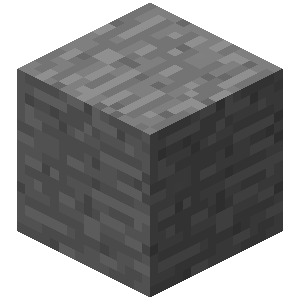
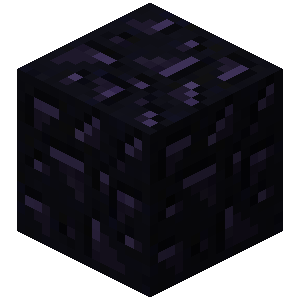
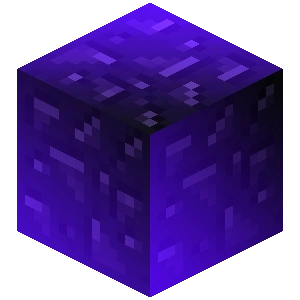
For Rendering Items and Blocks
Mod info:
- Open sourced
- Not actively maintained
BlockRenderer 0.3.3 (Download Page) is a mod that allows quick rendering of any item, block and head.
Please note that enchanted items shall be handled differently (See the Enchanted Items tab).
- Usage
- ` - generates a 512x512px render of the item you are hovering over
- ⇧ Shift+` - renders in smaller resolution
- Control+` - renders all the resources of the mod that the item belongs to
- Renders are stored in
<.minecraft directory>/rendersor<.minecraft directory>/Versions/<Your Version>/renders
Web tool info
- Open sourced
Note: Please use Enchantment Glint Tool unless finer adjustments are required.
Since screenshots end up with an inconsistent item glint, enchantment glint is applied to a render of the unenchanted form with an image editing software. To begin, you should download either Photoshop or GIMP as your image editing software, and one of the Glint Toolkit ZIP.
- Download Glint Toolkit ZIP Files
- Procedure
- Get Source: Take an unenchanted render with BlockRenderer, or a high-detailed render from Minecraft wiki or from Minecraft texture files.
- Resize Image: Resize an item render to either 150px or 512px. Resize a block render to either 300px or 512px.
- Launch Software: Open the corresponding PSD or XCF file from the Glint Toolkit. (Note that items and blocks uses different files. Notice the prefix
Ench_ItemandBlock) - Apply Glint: Paste the source image into the software as a layer and remove the existing block/item used for demo. (Note: With Photoshop, make sure the glint layer(s) are clipped down to the layer of the block or item. Click here for a video tutorial.)
- Generate Image: Export the result in PNG format.
Web tool info
- Open sourced

For Making Isometric Screenshots
Mod info
- Open sourced
- Not actively maintained
Mineshot v1.7-1.8.9 (Direct Download Link • Website 1 (1.7.10-1.12) • Website 2 (1.4.5-1.8.0)) is a mod for taking isometric and screenshots of high-resolution in a single-player world.
Please note that this tool cannot be used on servers: The world has to be first downloaded using World Downloader Mod.
- Usage
- Numpad 5 - toggles the isometric view
- ⇧ Shift+F9 (⇧ Shift+Fn+F9 on macOS) - allows you to customize your screenshot
- Alternatively, if this does not work, go to "Mod Options" in the main menu, select Mineshot in the mod list and click on "Config"
- Ctrl+Numpad 6 or Ctrl+Numpad 4 - allows to rotate the screenshot (WARNING! Not holding the Ctrl key will result in a non-isometric screenshot, which, in most cases, will have to be remade.)
- F9 (Fn+F9 on MacOS) - renders a screenshot (Note: This action may freeze your game depending on the size of the render and your machine's computing power)
- During the Render
- Make sure all GUI elements are hidden, by pressing F1
- The image has to be later post-processed to perform tasks such as removing the background (Note: While in most cases it is necessary, sometimes no post-processing is needed.)
- Make sure the file is a PNG
Mod info
- Open sourced
- Not actively maintained
World Downloader v1.0.6-1.8.9 (Forge) (Download Page) is a mod used to download a multiplayer server world. This is a Forge 1.8.9 port of the Original World Downloader.

World Downloader (Original - LiteLoader/Base edit) (Download Page) - The original version of World Downloader which supports 1.9-1.16.4 (4.0.x series) and 1.7.10-1.11 (3.0.x series). If you intend to use 1.8.9, please expand the section as shown in the image on the right. For installation instructions, look at the official Installation Instructions
- Instructions
- Load into the area you want to download
- Open the pause menu and press "Download this world"
- You may get prompted to enable multiworld support, if so click done in the bottom right to leave it disabled
- Ensure you load all necessary chunks before clicking "Stop download" in the pause menu
- Note: The Forge 1.8.9 port requires you to stop and start downloading every time you move into new chunks, else it only saves the chunks you are standing in at the time of stopping the download. You can see a map of which chunks have been saved by pressing "..." in the pause menu and navigating to "Saved chunks..."
- Once downloading is complete, you can find the downloaded world in your saves, under the name of your server by default (what you called Hypixel in the multiplayer tab)
Mod info
- Open sourced
- Actively maintained
WikiTools Renders for the latest version (Releases Page) is a fork of the Isometric Renders by Gliscowo (View Mod), which is a very useful mod for general rendering. The benefit of this approach is that features of the Isometric Renders mod can be accessed through WikiTools Renders.
This is a Fabric mod that can make isometric and perpendicular views of an area on the server. This is unlike Mineshot, which requires downloading the world and generally useful when working on a larger area.
Use the /wikirender command to access isometric renders commands, which instructions can be found on the Isometric Renders Wiki.
- Instructions
- Load into the area you want to render.
- Press C to start a selection at the selected block (if no block is selected then it starts 5 blocks ahead of the player).
- Press C again to finish the selection at the selected block.
- Use the /wikirender area command to open the render UI.
- Alternatively, you can input exact coordinates using /wikirender area <coordinates>.
- (Example: Render hub map with /wikirender area -8 70 -96 -2 76 -96
- Use the sliders on the left to adjust the scale, rotation and slant of the rendered area.
- Once ready, you can press Export on the right to render the image as a png file. Alternatively, you can copy the render to the clipboard to save on storage.
- Renders can be accessed at \.minecraft\renders or via the Open Folder button.
- Note: When rendering for the wiki, please use the Programmer Art resource pack ONLY to resemble 1.8 textures.
For Acquiring Data and Statistics
Mod info
- Open sourced
- Not actively maintained
HyblockRngAnalyzer (Releases Page) is a mod that lets you collect drop chances in Hypixel SkyBlock. The tool is useful for recording and analyzing data from different aspect of the game, to estimate the drop/loot chances.
- Features
- Get the Dungeon Chest contents and write them to a file in the config folder
- Get the Treasure and Loot Chest contents and write them to two file in the config folder
- Get the Crystal Nucleus Loot contents and write them to a file in the config folder
- Get Jerry Box Loot contents grouped by box type and write them to four files in the config folder
- /csv command to create more readable csv files from the database txt files
For Parsing Texts and Creating Minecraft Commands
Web tool info
- Open sourced
Infobox generator (Website) is a web tool for creating basic infoboxes and essence crafting tables using SkyBlock item data from the Hypixel API.
Because information may be missing or inaccurate, the generated results which serve a starting point for infobox editing should be verified before use.Others
- Help:Formatting: Instructions on formatting text with wiki markup.
- Help:Magic words: List of magic words that helps editing in source mode.
Not Enough Updates (NEU) Repository (GitHub) - As NEU has a larger team of testers, patrons and players with substantial amounts of in-game coins, their data gathering is usually more efficient than Wiki Editors. It is therefore useful to reference and use data from the NEU Repo. See also:
Note that minions are referenced as items named as<minion name>_GENERATOR_<tier>.json
Image compression tools are useful to shrink the file size. If compression shall be applied, lossless compression is recommended. Below lists some lossless image compression tools:
- The Minecraft Wiki recommends PNGOUT as it's compatible with most operating systems.
- An alternative is the File Optimizer.
| All Wiki Information | |||||||||||
|---|---|---|---|---|---|---|---|---|---|---|---|
| |||||||||||
| |||||||||||
| |||||||||||
| |||||||||||
| |||||||||||